A funny thing happened to my MacBook Pro's Photo.app Library the other day. Well, maybe not funny, per se, but extremely frustrating – it stopped syncing to iCloud Photos! I was out of phase for about a week of content between my iPhone/iPad and Mac, and the photos that were on my Mac were extremely low quality... and that was only when they would load.
After scouring the Apple support forums and reading what to do, I opted to repair my library of 100+ GB of photos. Which, unfortunately, led to having to fully rebuild my library when things went sideways. Of course. 🙄

This got me thinking about physical backups. I have Arq backing up my Mac's home directory to a Backblaze B2 storage bucket, but I omitted things from the sync that were already in the cloud – Apple Music and Apple Photos – which turned out to be the one damn thing I needed the most. Lesson learned: do not cheap out on an off-site, third backup method for your data.
What I needed was simple: a Network Attached Storage drive/device that can manage:
- A large pool of storage for managing archived data that's important to me/my family (see: photos, music, home movies, etc).
- A large pool of storage for backing up 30 years of my late father's photos, videos, home movies, music, and digital life.
- Time Machine back-ups for my Mac and family iOS/iPadOS Devices.
No shortage of research
I have a Gigabyte Brix 10th-gen Intel i3 Mini PC that I was using to manage my Plex audiobooks, so I started looking at FreeNAS and a few external Hard Drives to manage a simple RAID array. That research eventually got me looking at offerings from QNAP and Synology as set-it-and-forget-it solutions. Each of the latter would require the purchase of a full backup solution (Drive + Software) and then 3.5" HDD as storage. The main benefit being that I wouldn't need to manage anything - just toss in some drives and remotely connect.
After scouring YouTube for reviews for QNAP, Synology, FreeNAS, et cetera, I stumbled on Unraid – a dead simple operating system for self-hosted servers and network-attached storage. You install the Unraid software on a USB thumb drive and your license is attached to the drive's GUID. You can then run the Unraid server on any hardware that you can boot up from the drive. They have a 30 day trial for you to set up your own Unraid system and kick the tires before buying a license.
See where I'm going with this?
It was dead simple to set up. Dead simple to use.
GB-BRi3-10110 Specs
- Intel® Core™ i3-10110U CPU @ 2.10GHz
- 8GB SO-DIMM DDR4 @ 2666MHz
- 512GB M.2 NVME SSD
- 6 USB 3.2 Gen2 Ports
- Intel® Wireless-AC 3168, dual band WiFi & Bluetooth 4.2
- Gigabit LAN
Up and running
I followed the instructions to create my USB installer media and booted into the Gigabyte Brix's BIOS to change the boot order to the USB disk. That was easy enough for this life-long Mac user to manage. All I need to do now is fully erase that 512GB M.2 NVME drive and add it to the storage pool. Sorry (not sorry), Windows 11.
Building the new Unraid system
The holidays are here, so that means discounts on hardware. I decided to keep the Gigabyte Brix for now - I can always upgrade that later to a more powerful, multi-core system if needed - so I'm really only looking for a large drive enclosure and the drives themselves.
Here's what I already had on hand:
| Device | Price |
|---|---|
| Gigabyte Brix GB-BRi3-10110 | $200 |
| Crucial 8GB DDR 2666 RAM | $40 |
| Intel 670p Series M.2 2280 512GB PCIe NVMe | $67 |
| Western Digital 4TB MyBook External HD | $135 |
Here's what I purchased:
| Device | Price |
|---|---|
| Sabrent 4-Bay USB Docking Station | $229 |
| MDD 16TB SATA 6.0Gb/s 3.5" Internal Hard Drive | $149 |
| MDD 12TB SATA 6.0Gb/s 3.5" Internal Hard Drive | $99 |
| 3' USB 3.2 Type C to USB-C Cable (x2) | $12 |
| UGREEN USB 3.2 Adapter with 4 USB-C 3.2 Ports | $21 |
I was "all-in" with this homebrew Unraid system for a grand total of $952
- $442 was sourced from existing hardware and drives laying around.
- $510 was net-new hardware, drives, and cables/accessories.
Connections!
I was able to connect the Sabrent Docking Station to the Gigabyte Brix with the included USB 3.2 Type A to Type C cable. That will be replaced eventually by a 3' USB 3.2 Type C to C cable. I wanted to get my parity drive up and running as fast as possible before I started to expand by adding the 12TB drive to the storage pool.
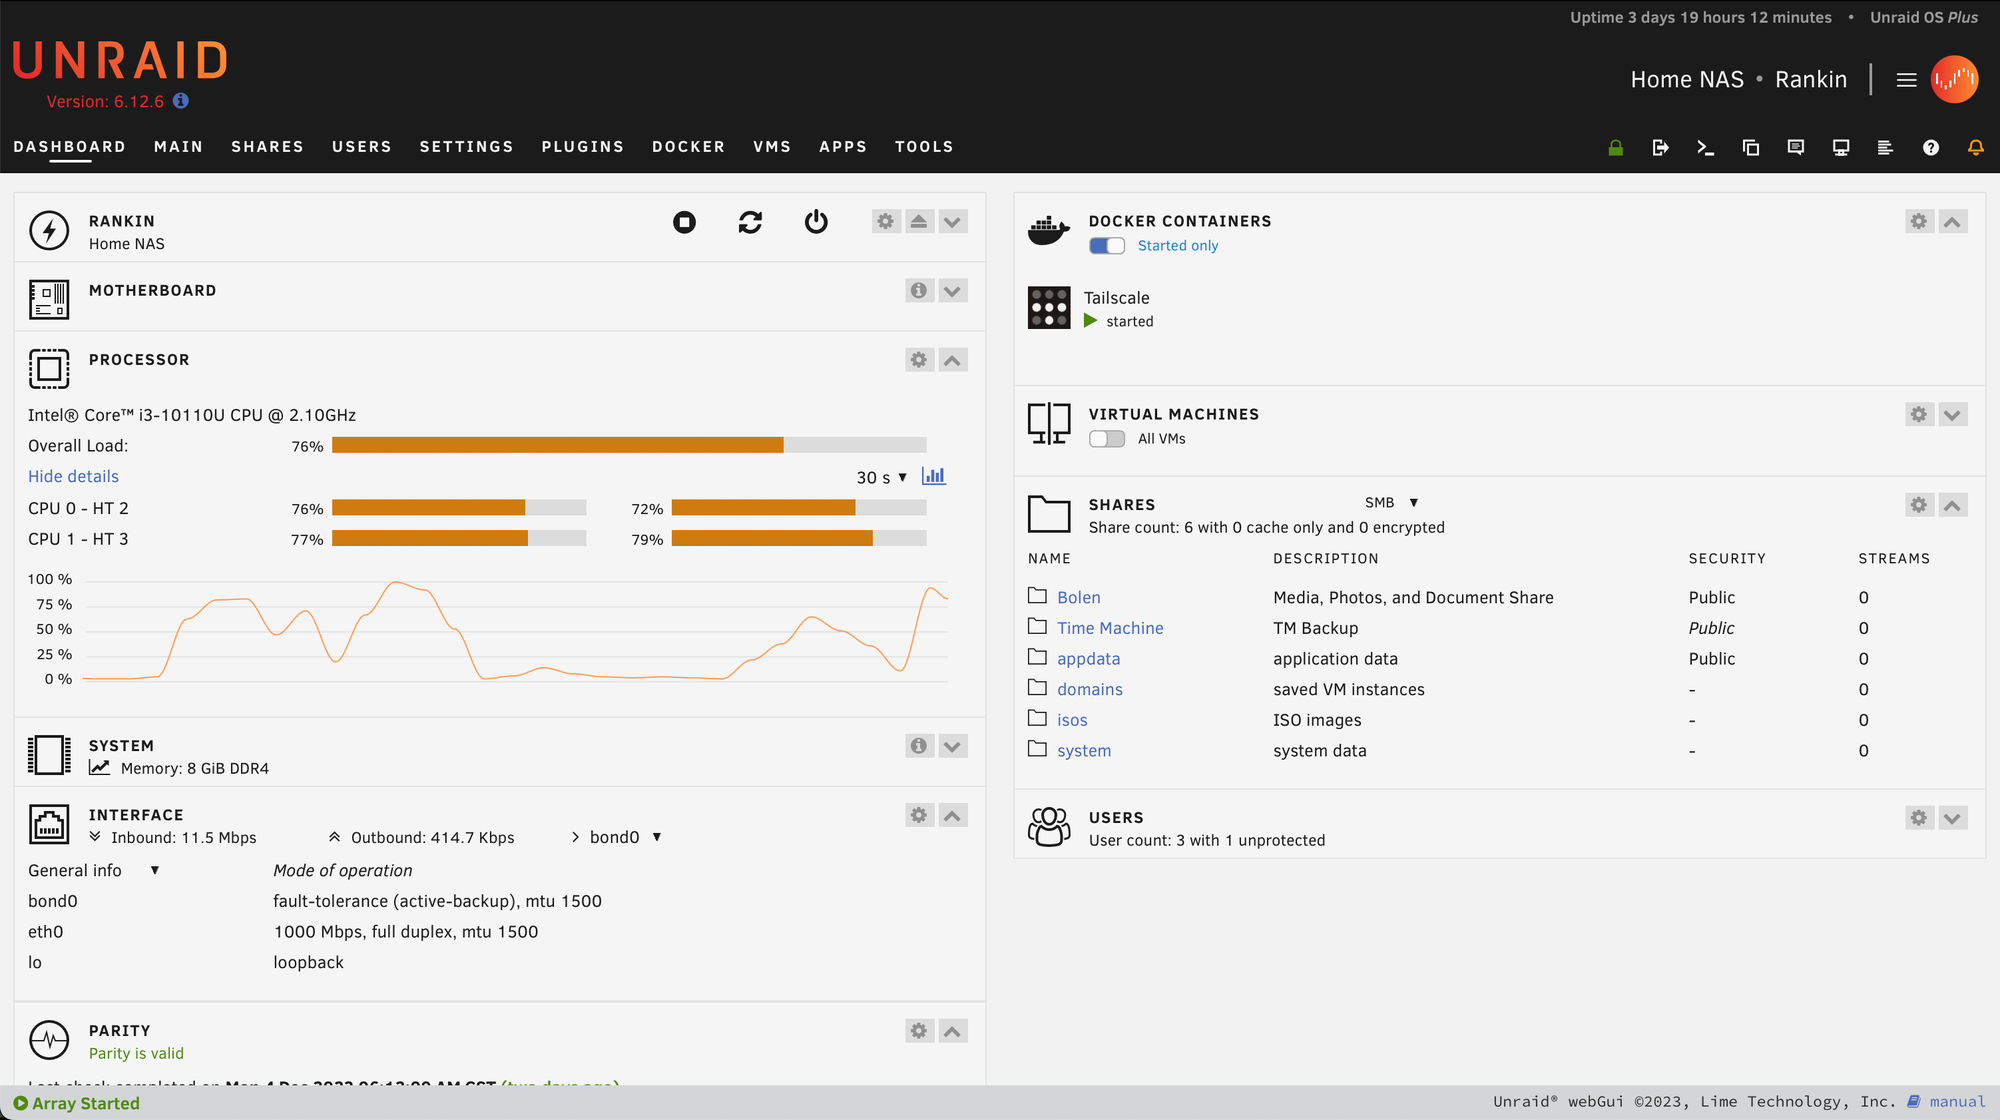
The result is below: a 4TB Time Machine drive and 12TB block storage drive for all sorts of documents, music, movies, media, et cetera. With Tailscale, I can access the Home NAS anytime I want via Apple's Finder or the Files.app in iOS/iPadOS when connected to my Tailnet.


